 Lip sync
Contents
Resources
- DAIMON: Dialogue-oriented Artificial Intelligence deMONstrator
- IBM Watson dialogue understanding tutorial
Software
- Unity 3D (version 2019.3.1.f1)
- Maya (version 2020)
- SALSA lipsync Suite: https://assetstore.unity.com/packages/tools/animation/salsa-lipsync-suite-148442
Part 1. Preparation
Step 1.1: After you have already created or downloaded a character > you need to create lip or facial animations by using blend shape.
Step 1.2. I created 12 facial animations including eye blinking, a small mouth opening, a medium mouth opening, a big mouth opening, viseme O, smile, and sad (see Image of step1.2.1 and 1.2.2). If it is possible , you can create more blend shapes based on phonemes, such as L, E, V, F, A, U, etc.
Step 1.3 Next, we need to import the character with blend shapes from Maya into Unity.
Part 2. SALSA lipsync settings in Unity
SALSA lipsync setting has two parts, i.e., lip animations and eye movements.
Let’s do lip sync at first.
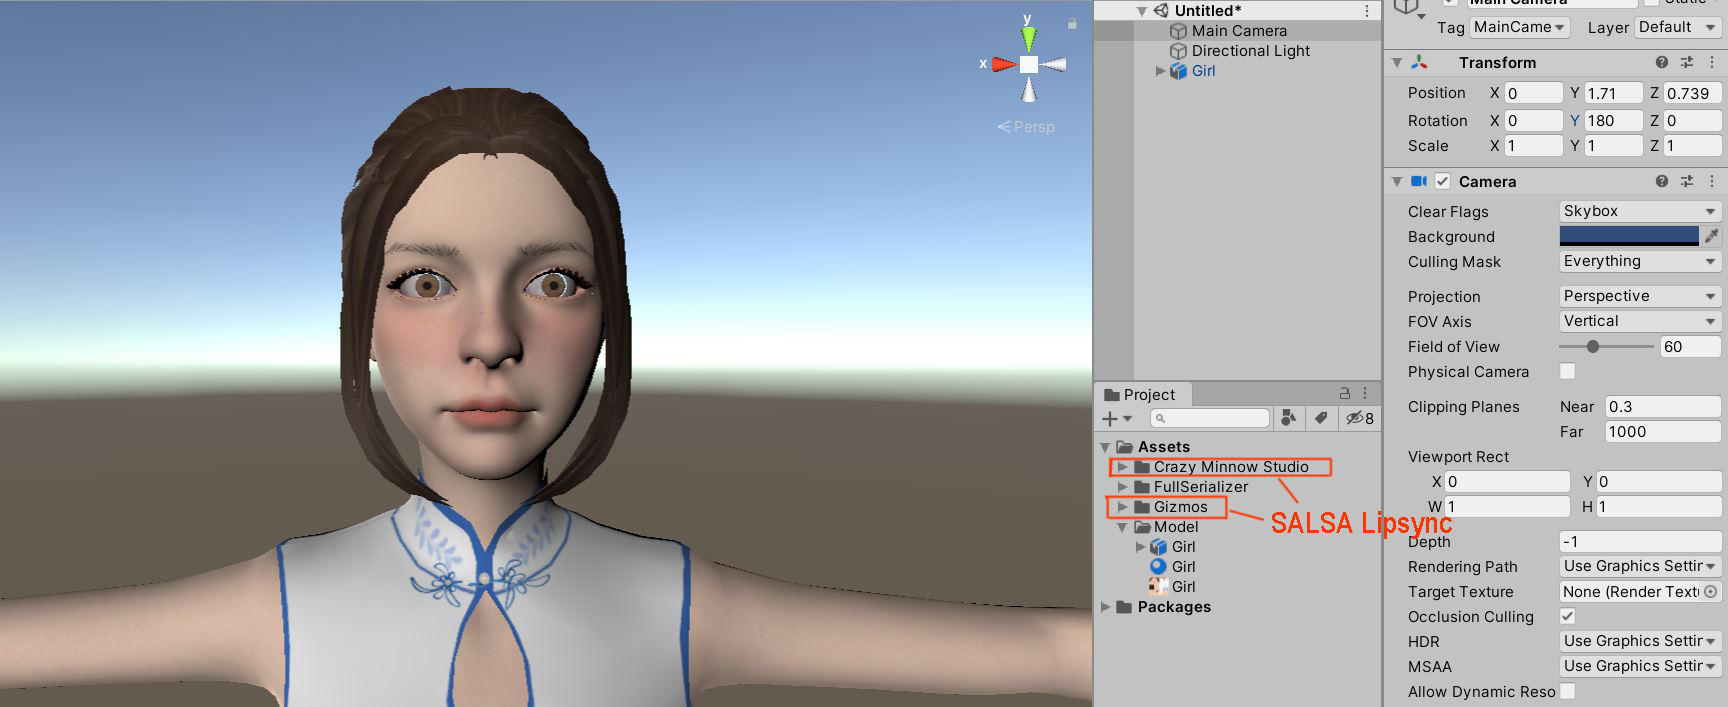
Step 2.1. Create a new Unity project > import your avatar into Unity > and then download SALSA lipsync suite and import it into Unity.
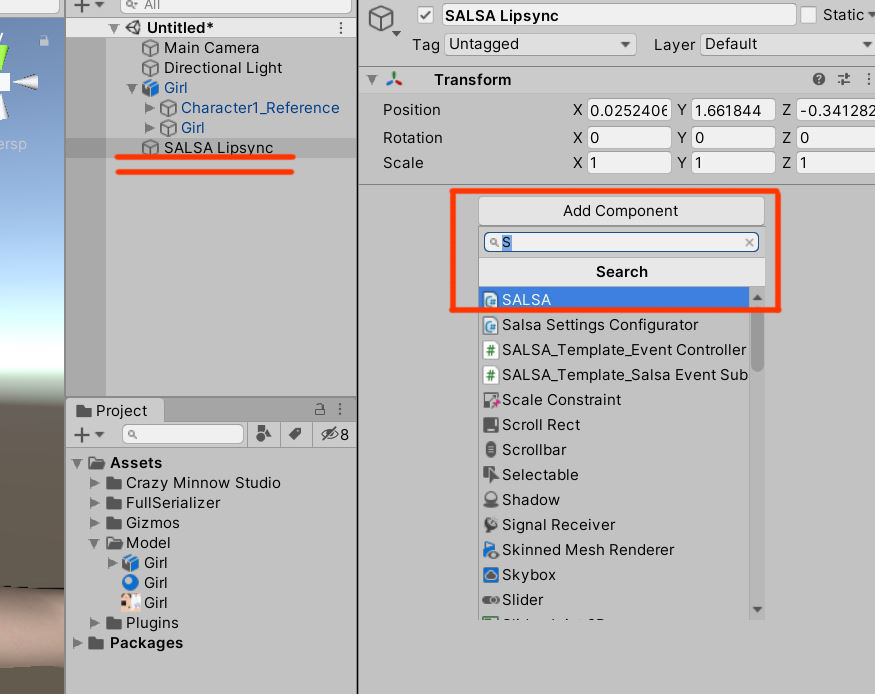
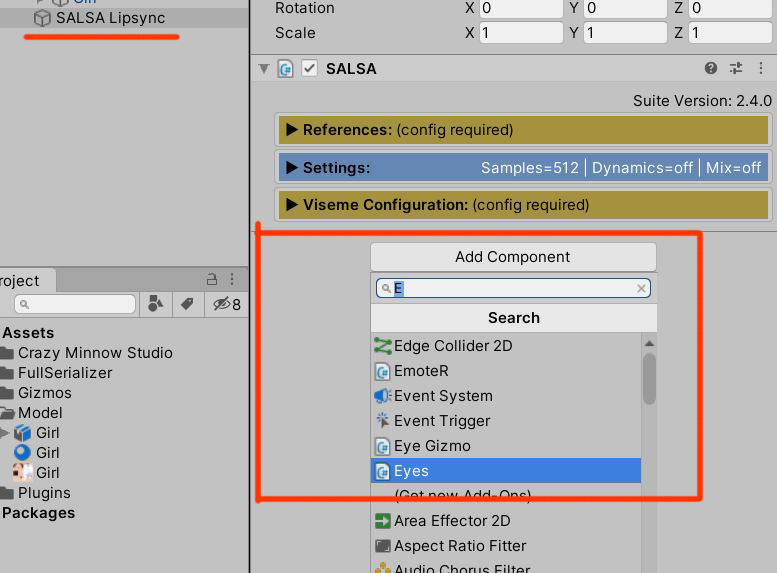
Step 2.2 Create Empty on Hierarchy, named SALSA Lipsync > click on the Add Component button > type SALSA > select SALSA.
Step 2.3 Again, select SALSA Lipsync > click on the Add Component button > type Eye > select Eyes.
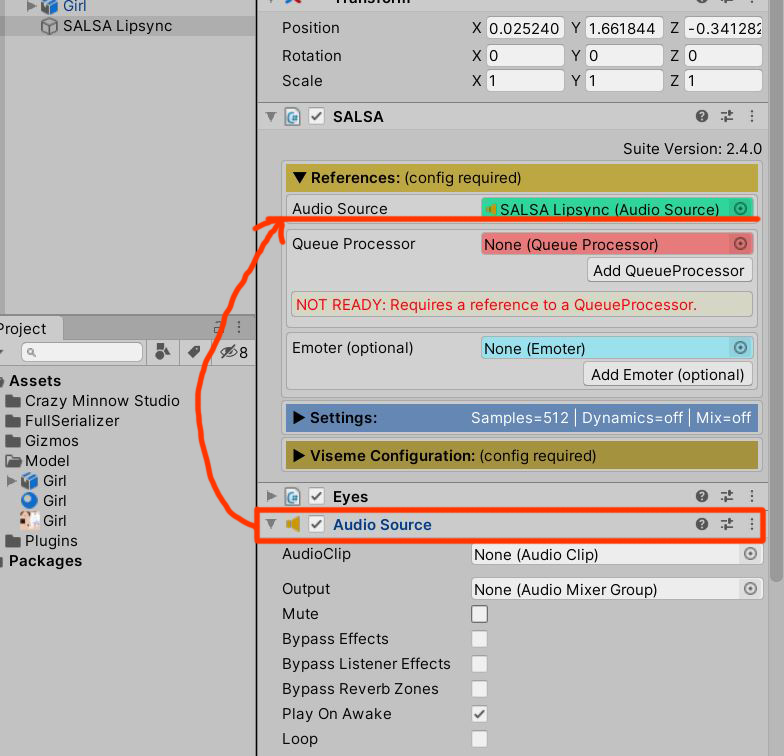
Step 2.4 Add component under the Eyes script > type audio > Select audio source > open References on SALSA, you can see Audio Source under the References > drag audio source that we added to Audio Source > Add QueuePorcessor on Queue Processor.
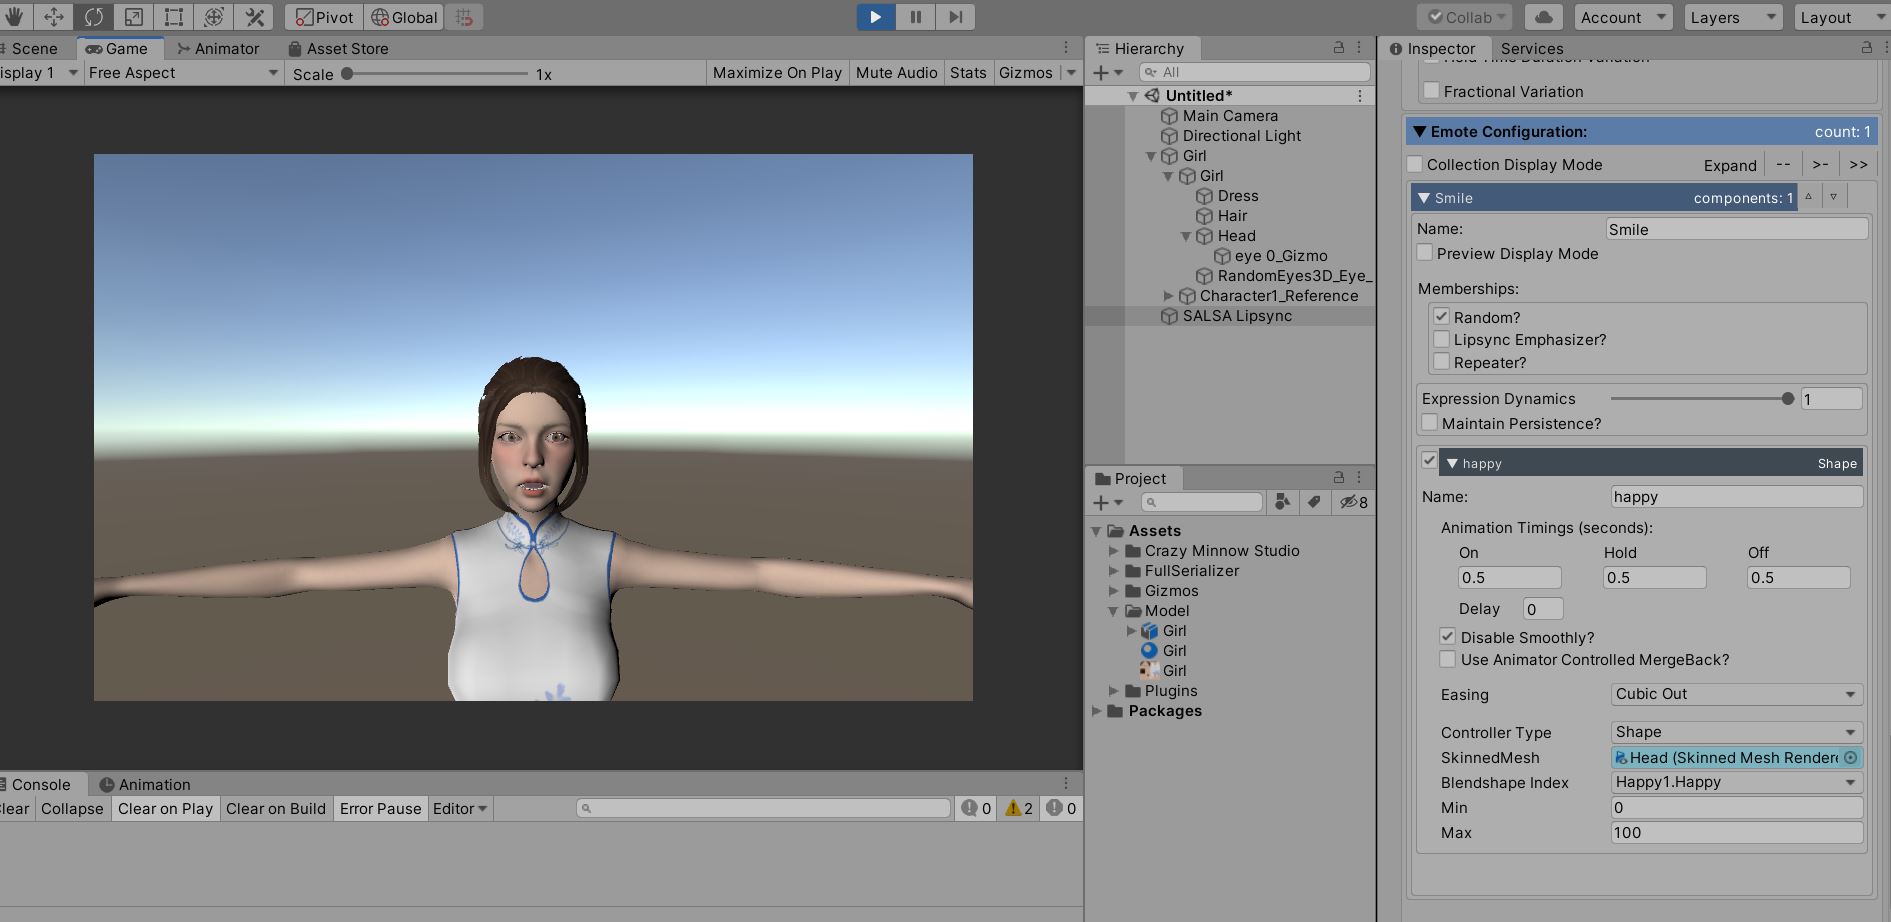
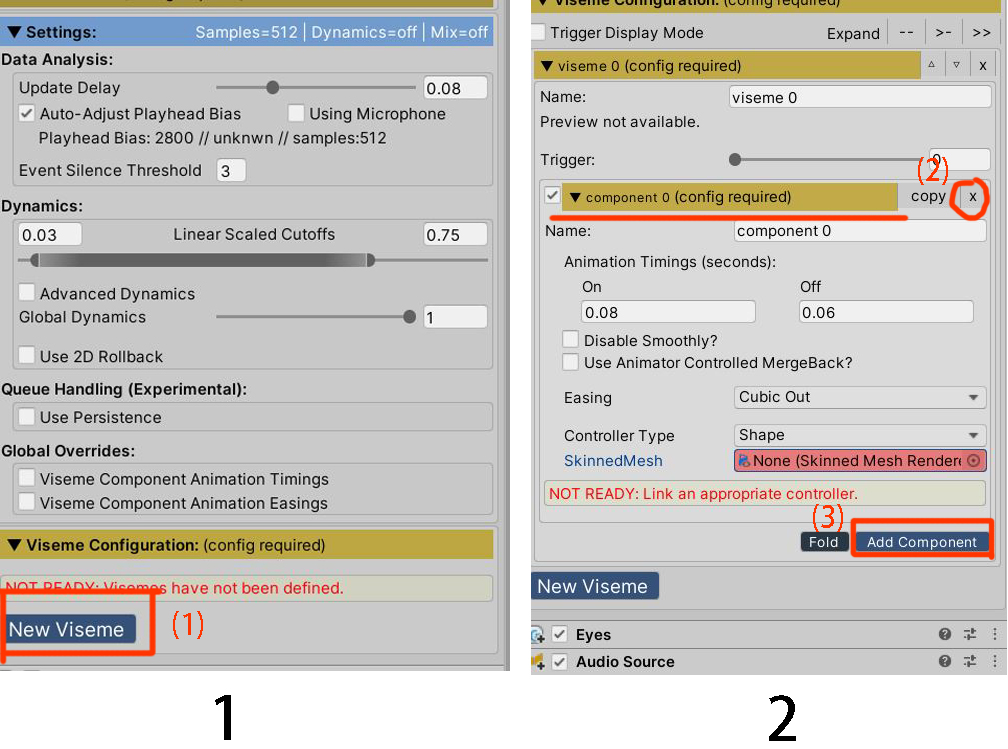
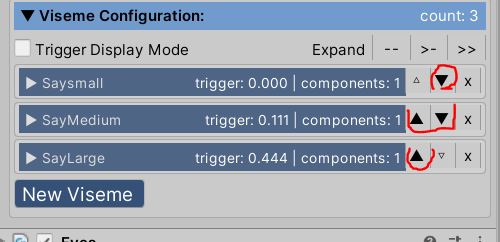
Step 2.5 Click on Viseme Configuration > click on New Viseme > then remove component 0 (config required), because it will automatically add > then you need to add component.
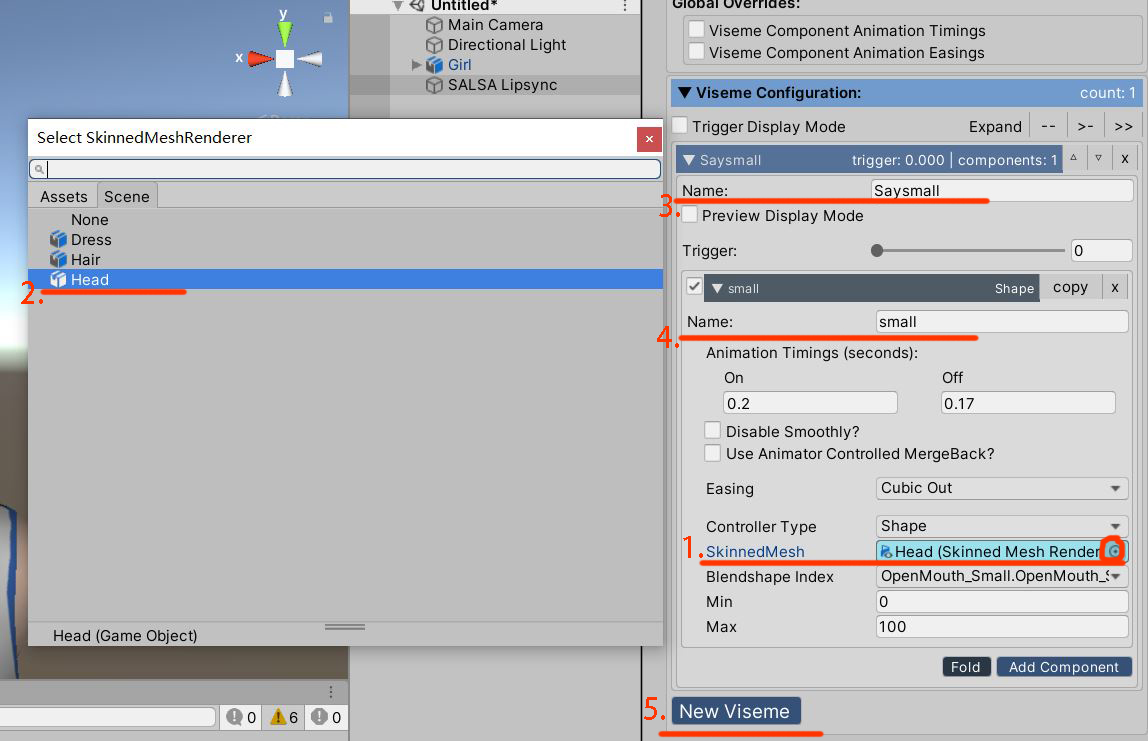
Step 2.6 Select your avatar with blend shapes on SkinnedMesh > called SaySmall on the Name > rename component, called small > select your correct blend shape on SkinnedMesh. For example, I created small/medium/large mouth opening, so I need to choose Small Open Mouth. If you’d like to check what it looks like, select Preview Display Mode. You also can change the size of mouth opening on Min and Max (under the Blendshape Index).
Again, click on New Viseme > rename it on the Name button, SayMedium, and change component name, called medium > and select Medium Open Mouth on Blend shape Index. And again, create a new viseme for large mouth opening.
Step 2.7 The lip movement on SALSA has order from the lowest management to highest management. Saysmall is the lowest, and SayLarge is the highest, so that it can list the visemes by names. You can adjust what viseme you’d like to setup by clicking on arrows.
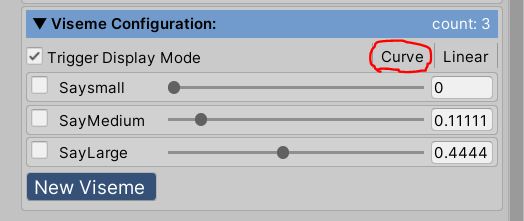
Step 2.8 Select Trigger Display Mode> select curve or linear. Now you can put an audio on AudioClip (Audio Source) and play it to check what it looks like.
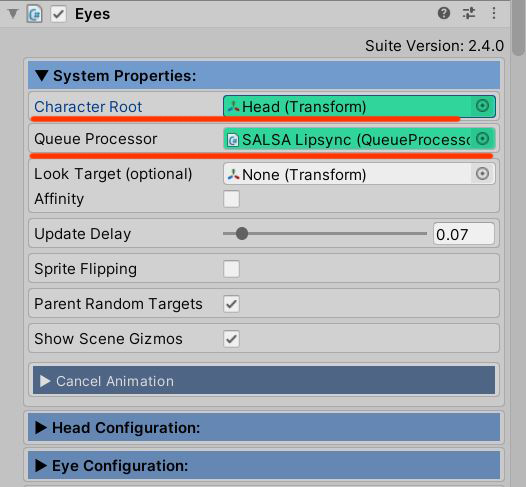
Step 2.9 Next we can create eye blinking. Under the eyes script > select your model with blend shapes on Character Root > select QueueProcessor that we created >
Step 2.10 Select Eyelid Configuration on Eyes > select Eyelid templates and choose blend shapes > Select your model with blend shapes.
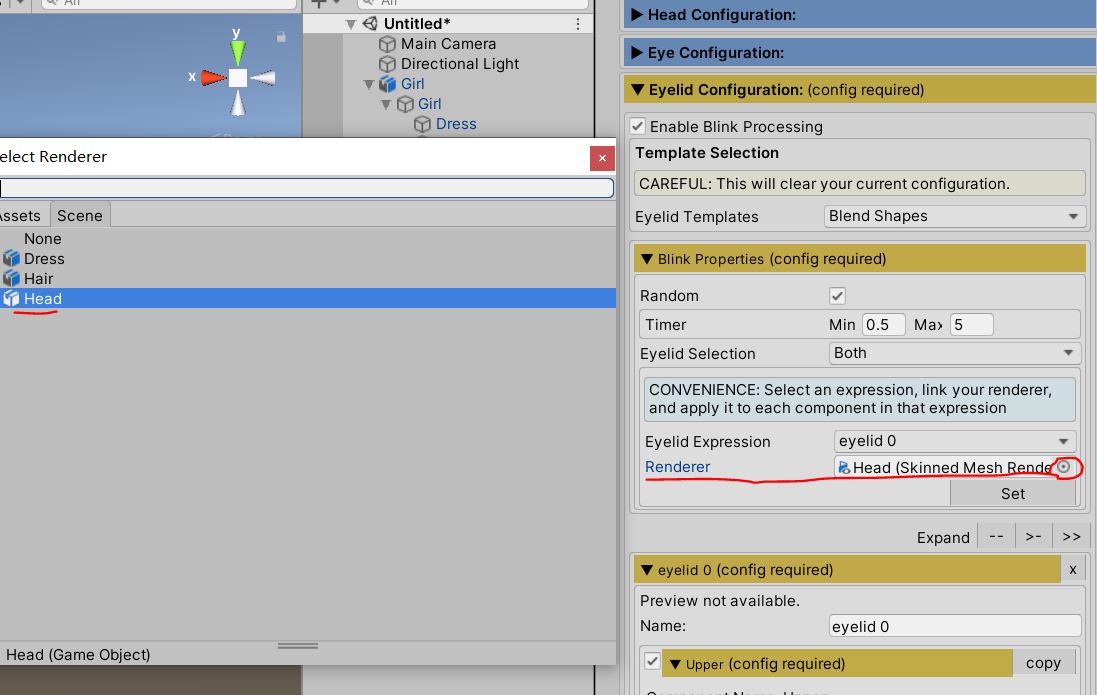
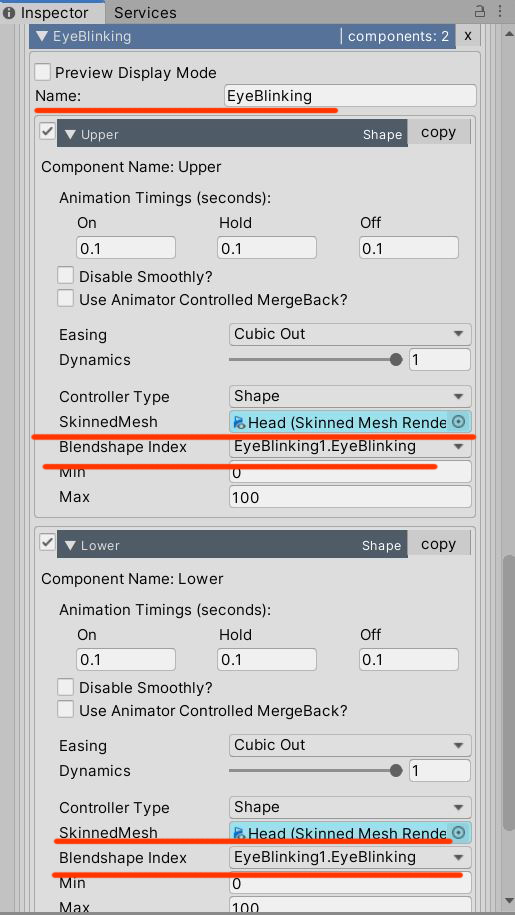
Step 2.11 Because this model does not have looking up/ down/right/left, so I only keep a pair of eyelid (upper and lower), and remove others > called it EyeBlinking on the Name button > Select your avatar with blend shapes on SkinnedMesh > select Eyeblinking animation on Blendshape Index > and do it again on lower selection.
Step 2.12 Now you can play it. If you would like to build emotion animation, add component > type Emote > select Emote R, it is same way to manage it. Good luck!